
Luxury Vinyl Plank Flooring Explained
LVP stands for Luxury Vinyl Plank, and it’s one of the most popular flooring choices today and for good reason. It came about as a solution to two common problems: vinyl sheet flooring was tough but not very stylish, and real wood looked great but couldn’t handle moisture, especially in places like basements or bathrooms. So someone had a smart idea: Let’s take the durability of vinyl and make it into easy to install planks, we’ll print realistic wood patterns on top and add a cushion underneath!
Boom, Luxury Vinyl Planks was born and offers you the realistic look of hardwood with the waterproof benefits of vinyl.
What is 'Luxury Vinyl Plank'
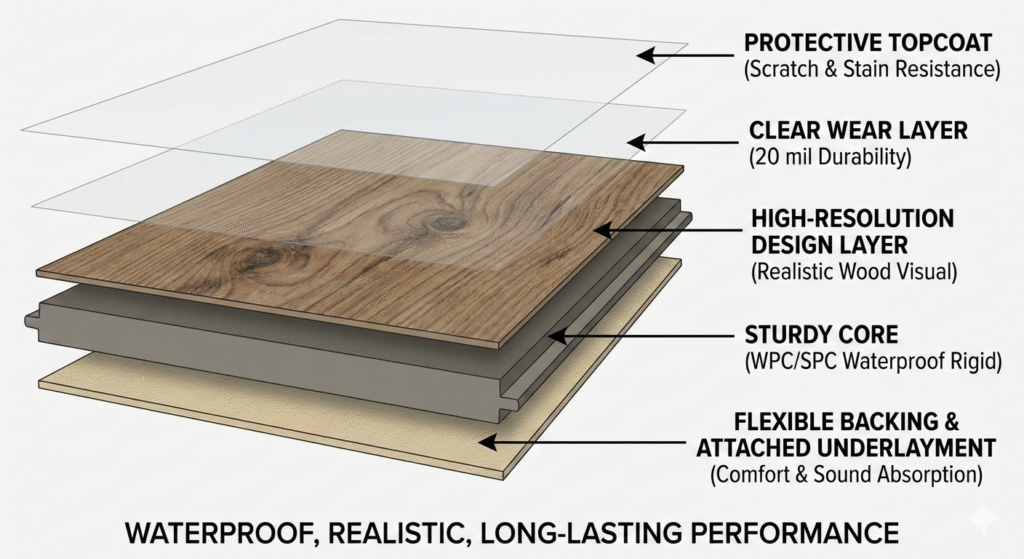
LVP or “Luxury Vinyl Plank” is extruded polymer plank with a vinyl print and additional wear layer on top along with an attached padding underneath.
LVP is usually a floating floor, which means it’s not attached to the subfloor in anyway so that it can expand and contract as needed. LVP is attached together by either a locking mechanism usually either a drop lock or angle lock.
LVP comes in several layers and it’s thickness is measured in Millimeters but it’s wear layer is measured in MIL’s. Each layer is pressed together a high temperatures and intense pressures creating the planks.
Cheaper products will be thinner (3 mm) and also have a thinner wear layer. Anything less than a 6mm and 20 MIL’s can be prone to failure, despite what the manufacturers say. You want a solid product that has more surface area on the joints so that it will hold together and fight the expansion and contraction that naturally happens due to our homes temperature’s fluxing.
PRO TIP: LVP goes under your baseboards, which require them to be removed. Be financially prepared for the removal and reinstallation of your baseboards along with touch ups!
You can use quarter round, but it leaves ugly edges and creates gaps when furniture is placed against walls!
SPC vs WPC
SPC vs WPC: You’ve heard these terms while shopping around but what do they actually mean and which one is better for you? Well, SPC or Stone Plastic Core is what the core of LVP is made from and includes calcium carbonate or other materials as an durability agent. This makes the floors more rigid, but dense and very solid. WPC or Wood Plastic Core consist primarily of thermoplastics, calcium carbonate, and also includes foaming agents. The foaming agents are what give the core its softer, thicker, and lighter qualities compared to SPC. Wood was used in early products, but is no longer an industry standard, though the name stuck around.
Which is better? That depends! SPC is prone to breaking on the edges if the subfloor isn’t perfect, but it can hold more weight like a pool table and is more dimensionally stable meaning, it wont expand and contract as much as WPC would in a sunny room, but WPC can handle edge stressing much better as it’s not nearly as brittle as its stone counterpart is, plus it’s also much lighter.
This didn’t really answer your questions though huh? Here’s a good way to look at it, this product will basically only fail on the edges, so why would they make it brittle then? Well, because limestone is cheaper than foaming agents! So they use limestone and require a very smooth subfloor to help those edges not crack. We would recommend a thicker WPC and so still ensure your subfloor is perfectly flat as your covered from top to bottom!
Let's Compare Locking Mechanisms
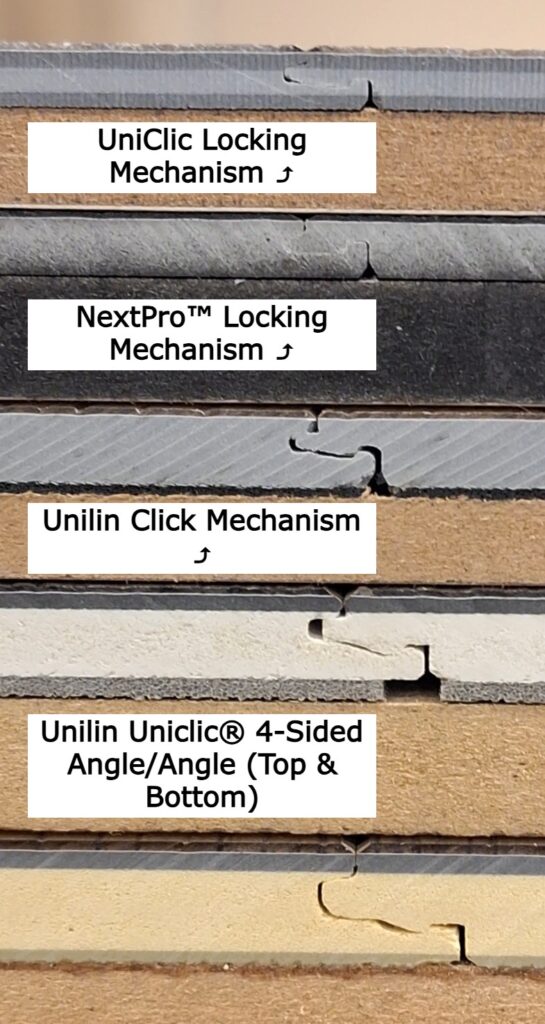
Luxury Vinyl Plank flooring uses interlocking locking mechanisms that allow the planks to connect without glue or nails, creating what’s known as a floating floor. These systems typically rely on ‘click-lock’ technology, where the planks join through a tongue and groove or angle in angle connection. From traditional click lock setups to modern fold down designs, these mechanisms are engineered to make installation easier while ensuring a strong, secure fit.
The most common systems are the standard Unilin locking mechanism, the 2G drop lock and the more advanced 5G fold down. The 2G system is appreciated for its simplicity, one end slips into a small saddle as the plank is dropped into place, however, because it doesn’t fully lock on all sides, the stability often relies on perimeter trim like baseboards to prevent shifting!
The 5G fold down system improves on this by using a spring loaded plastic shim at the end joints. As the plank is lowered, the shim snaps into place, creating a tight, four-sided lock that boosts both durability and overall performance. Glue down installation is another option, but it uses adhesive instead of mechanical locking and functions more like a traditional permanent floor.
When choosing an LVP locking mechanism, factors such as ease of installation, long-term stability, and manufacturer reputation are important. DIY friendly systems like 2G and 5G make installation more accessible, though a professional installer can ensure a flawless finish and minimize risks like gapping or damage during tapping, because the locking system plays a major role in how well the floor holds up over time, checking the quality, warranty, and engineering behind the specific mechanism can help guarantee a floor that performs well for years to come.
Cheap VS Quality LVP
Ok, so what products should you avoid and which ones should you pick? We’ll go over that now! Cheaper LVP’s typically are going to be much thinner like a 3mm or 4mm product and usually come in a 7″ x 48″ plank and have a drop lock mechanism. They will have no additional features and usually will scream how waterproof they are. Most of the time too, you will see a thin locking mechanism, which as mentioned above is where these products typically fail, so a little uneven subfloors and you just broke the locking joint. Over time it’ll get worse and eventually you either need to replace that plank or the whole area. Which is why cheaper flooring only cost’s more in the long run.
Better LVP’s will come with stuff like beveled edges and registered & embossed textures, but what they don’t share is how many plank repeats the are and how far the product can go before needing an relief transition strip. Plank repeats require more printing, thus more production times, and the more stable a product is the longer it can go before needing a transition.
Here’s what you want:
- WPC Core
- 5G locking Mechanism
- 20 Mil’s Wear Layer 8mm Thickness
- 9″ x 72″ Planks or 7″ x 60″ Planks.
- IXPE Cushion/Backing (these polymers have two molecules, not one like EVA, so they will be less cushiony, but more durable for the life of your floors.)
Pro Tip: If your trying to save some money on flooring and don’t care about colors just quality, call your local flooring store and tell the manager, “Hey, when discounted or reduced stocked items are being liquated, let me know as I want to snag X amount of flooring, but only if something is on a actual manufacturer sale, not a showroom sale.”
Please keep in mind, those sales do not happen often and you can’t be too picky, but if you need to redo the flooring in your rental in about a year or two, boom, we just saved you some money.
SCRATCH RESISTANce Explained
Scratches are measured on a hardness scale. The hardest thing you have in your house is most likely the silica oxide particles in sand paper, which your not going to just start rubbing on your new floors, but in case you did, LVP will now and day’s come with a aluminum oxide coating and it’s hardness rating is a 9 of 10.
The MIL’s are there to prevent deep scratches, but can’t guard against all scratches, hence why it’s referred to as scratch resistance, you can scratch these floors by dragging a couch with a staple under the foot across them, we know because one of us has done that to our own floors!
Think of slicing meat with a knife, you don’t push down, you drag it across the cut. When you drag stuff across your floors your cutting into that layer, preventing you from hitting the print layer, but none the less it can cut through and leave a scratch!
Prepare for Hidden Costs of Floor Prep
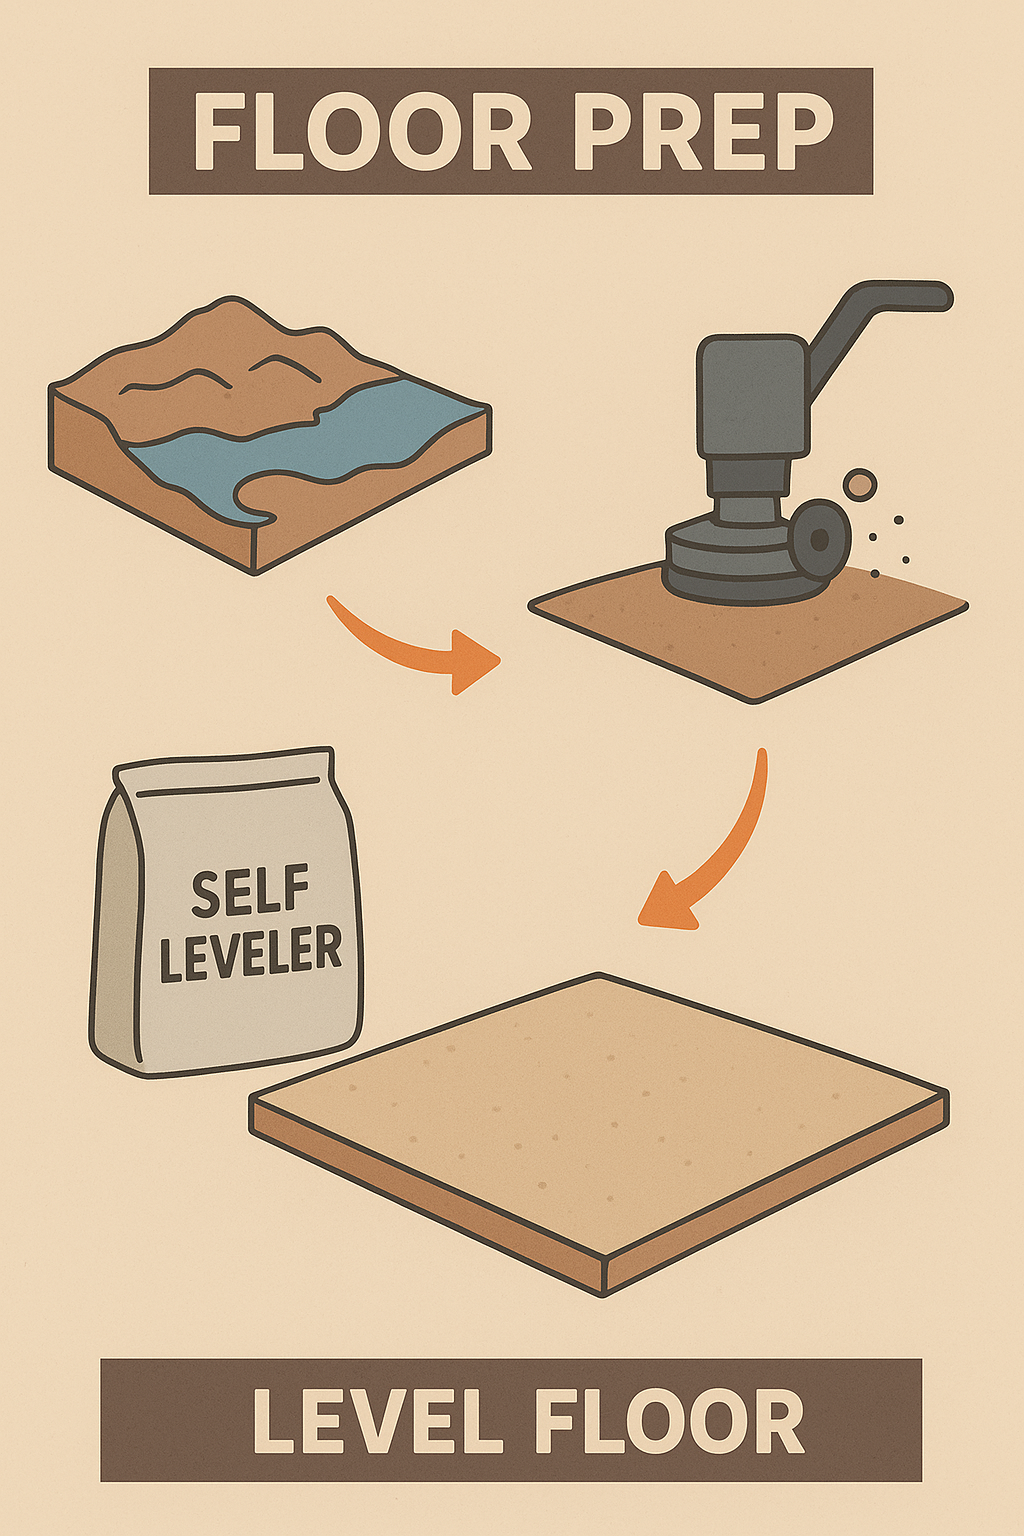
The answer is floor prep! Floor prep is absolutely hyper-critical for long lasting LVP. What is floor prep? Well let me explain! Your subfloor is like a mini island with peaks and lakes. Floor Prep is when we sand or grind down the tops of those mountains and use Self Leveler to fill in those lakes!
We can create an even playing field for the floors to be installed on! Some other forms of floor prep can include filling in expansion joints, roll on moisture barriers and using products like Kilz for urine smells. If you’re installing on concrete, then floor prep is crucial along with using a 6 mil vapor barrier for moisture control.
The cost of floor prep can be much more than expected and is sometimes hard to determine as you can’t quite see underneath your current floors to get an idea of what we are working with, so for both you and the flooring company this part is kind of like a can of worms that we won’t know what those costs are until we demo the current floors and see what’s needed to bring them back to life.
Even if you just remove carpet on a wood subfloor, I would still anticipate floor prep to be involved in one way or another!
Where & WHEN TO USE LVP?
Generally, the best time to use LVP is when you buy it from us! Just kidding, LVP can be used in a ton of places! The most common are area’s with high traffic and wet zones. If you have a rental, perfect! Just bought a new house, perfect time too! The only situation where we would avoid using LVP is in multimillion dollar houses or estates. Read the installation specs for your product to find exactly what’s in the warranty in terms of installation parameters. Some companies like Bjelin make LVP that goes up walls! So be creative and follow the installation specs!